Exam Builder - Create Mode
The Exam Master's Exam Builder
The Exam Builder is an intuitive tool designed to streamline the creation of customised exams. This guide will walk you through the process of selecting and arranging exam questions to crafting an entire assessment tailored to your students' needs.
Selecting the Exam Board
- Start by choosing the exam board: Our platform supports OCR, AQA, Pearson's Edexcel, and Eduqas. Selecting an exam board filters the question bank to show only the relevant questions.
- Filter by specification points: Further refine the questions displayed by selecting specific specification points that relate to the curriculum areas you wish to assess.
Please note: You can add questions from across all exam boards (from the entire question bank) into your assessments, these filters are only there to help you find the questions you want.

Building Your Exam
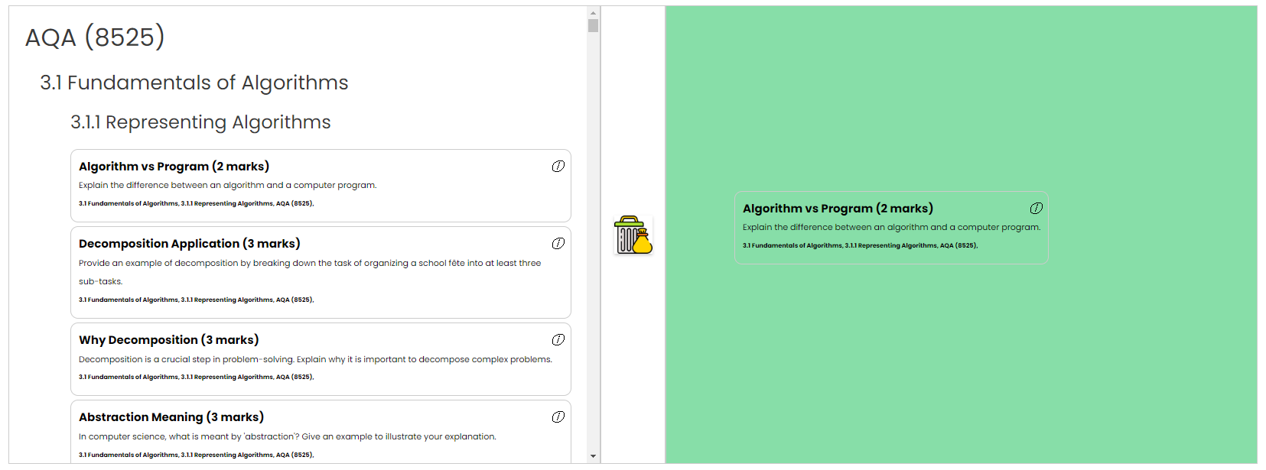
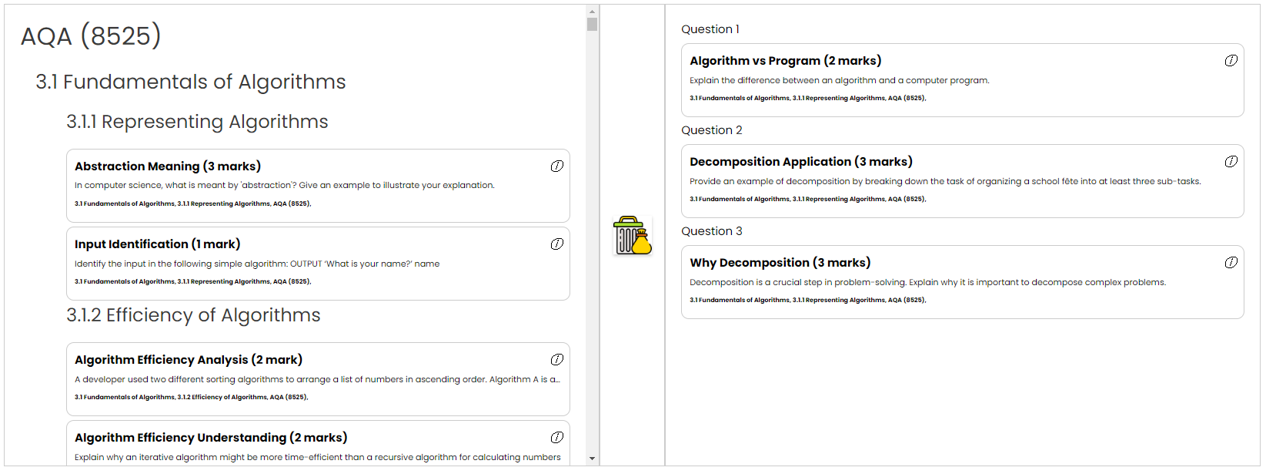
- Drag and Drop Interface: Easily drag questions from the filtered question bank into the assessment area. This allows you to build the structure of your exam as you see fit.
- View Question Details: Hover over the information (i) icon next to each question to view full details, helping you make informed decisions about their inclusion.
- Remove Questions From Assessment: Simply drag the question over the Trash icon and release. The question will be added back to the question bank.


Configuring the Exam
- Naming Your Exam: Assign a name to your exam for easy identification. This is particularly useful for organizing multiple assessments.
- Set Start and End Times: Define the availability window of the exam by setting start and end times. This helps in administering timed assessments.
- Select Assessment Mode:
- Teacher Assess: In this mode, students submit their answers for teacher evaluation. You can score responses and provide optional feedback.
- Student Self Assess: Students mark their own responses based on provided mark schemes after submission. Scores are generated immediately, though teachers can revise these scores and add feedback.
- Configuring the Exam
- Choose a Group: Select the class or group of students to whom the exam will be assigned.
- Selecting Students: You can choose to assign the exam to all students in a group or select specific individuals.

Finalizing Your Exam
Click the 'Create Assessment' button once you are satisfied with the setup. The exam will be created and assigned to the selected students. You will be able to track completion and performance through the platform's analytics tools.

Exam Builder - Edit Mode

Once you have created an assessment, it may be necessary to make adjustments. Whether it's a change in the schedule, updating questions, or correcting errors, our Exam Builder's 'Edit Mode' allows for easy modifications.
- Accessing Edit Mode:
- Navigate to the exam you wish to edit by selecting it from a dropdown menu. This action loads the existing details into the Exam Builder.
- Modifying Exam Details:
- You can edit various aspects of the exam, including:
- Name of the Exam: Update the exam title as required.
- Start and End Times: Adjust the time window in which the exam is available.
- Questions and Order: Add new questions from the question bank or remove existing ones. Rearrange the order of questions to better suit the assessment flow.
- Assignment: Reassign the exam to different students or groups as needed.
- You can edit various aspects of the exam, including:
- Saving Changes:
- Once all necessary changes are made, click the 'Update' button. This will save all adjustments and update the exam for all assigned students.
Exam Builder - Clone Mode

Creating a duplicate of an existing exam is useful for reassigning the same assessment to a different group of students or to those who need to retake it. The clone function simplifies this process by creating a copy of the exam that can be edited if necessary.
- Initiating the Clone Process:
- Locate the exam you wish to clone and select the 'Clone' option. This creates an identical copy of the selected exam.
- Editing Cloned Exam (Optional):
- If needed, make any adjustments to the cloned exam, such as changing the exam name, adjusting the date and time settings, or reassigning to different students or groups.
- Finalizing the Cloned Exam:
- After making any desired edits, use the standard exam creation process to finalize the settings and assign the exam to the appropriate students.
Summary
Editing and cloning exams are powerful features that add flexibility and efficiency to your assessment management. By enabling easy modifications and quick duplication of existing assessments, these tools help you adapt to various teaching scenarios and student needs.
